In previous tutorial we created a simple chat application, in this tutorial we are going to add support for MongoDb database to store messages, users and rooms.
Nest Application
Database Setup
In this tutorial we are going to use MongoDb as database however you could use another database with some little tweaks. We are going to explore two ways to add MongoDb locally.
|
Before continue with this part, in the console go to |
Brew Installation
brew install mongodbthen you could just start it running
brew services start mongoThen start the mongo shell pointing to the chat database:
mongo chatAfter you start the mongo-shell you need to add user chat-admin, set password password123 and add the role dbAdmin for chat database. so run next commands in the console:
db.createUser({user: 'chat-admin', pwd: 'password123', roles: [{role: 'dbAdmin', db: 'chat'}]})then you are going to get something like next:
Successfully added user: {
        "user" : "chat-admin",
        "roles" : [
                {
                        "role" : "dbAdmin",
                        "db" : "chat"
                }
        ]
}
then just press combination ctrl + C to stop mongo shell.
|
If you want to start another instance of mongodb in the same port, for example with |
Docker Compose Setup
The second way is to use docker and docker-compose. To do that, we need to create a docker-compose.yaml file and add next code:
version: '3.0'
services:
  mongo:
    image: mongo
    ports:
      - 27017:27017 (1)
    volumes:
      - ./docker-compose-files:/docker-entrypoint-initdb.d (2)
    environment:
MONGO_INITDB_DATABASE: chat (3)| 1 | whenever we run docker-compose up mongo the database will run and listen on port 27017. |
| 2 | We create a virtual volume from docker-compose-files folder created in the host machine and share it inside the container as docker-entrypoint-initdb.d. In this folder we will put initialization scripts to start the database with preloaded data. |
| 3 | We set the default database that will be used by the application |
As you can see in the previous file docker-compose needs initialization files to start the database, so we will create file docker-compose-files/initdbs.js which will contain the initialization script. Then add next code to it:
db.createUser({
  user: 'chat-admin',
  pwd: 'password123',
  roles: [{role: 'dbAdmin', db: 'chat'}]
}); (1)| 1 | creates a new user chat-admin, sets password password123 and add the role dbAdmin for chat database. |
There are several advantages of using docker-compose over local brew installation:
-
We can create a new MongoDB database for every project without affecting others.
-
We could destroy the database data just running:
docker-compose down -vand restart it runningdocker-compose up mongo. This is very important for integration testing. -
We can specify NodeJs and MongoDB version we are working, so others just need to run
docker-compose up mongoto have the same environment as us.
Nestjs/Mongoose
In order to add support for mongodb database, Nest comes with the ready to use @nestjs/mongoose package. This is one of the most mature available so far. Since it’s written in TypeScript, it works pretty well with the Nest framework.
Firstly, we need to install all of the required dependencies:
npm i -s @nestjs/mongoose mongooseOnce the installation process is completed, we can import the MongooseModule into the root ApplicationModule.
import { Module } from '@nestjs/common';
import { AppController } from './app.controller';
import { AppService } from './app.service';
import { MessagesGateway } from './gateways/messages/messages.gateway';
import { RoomsController } from './controllers/rooms/rooms.controller';
import { MongooseModule } from "@nestjs/mongoose"; (1)
import { Message, MessageSchema } from './models/message.model';
import { Room, RoomSchema } from './models/room.model';
import { User, UserSchema } from './models/user.model';

@Module({
  imports: [
    MongooseModule.forRoot('mongodb://chat-admin:password123@localhost/chat', {}), (2)
    MongooseModule.forFeature([
      {name: Message.name, schema: MessageSchema},
      {name: Room.name, schema: RoomSchema},
      {name: User.name, schema: UserSchema}
    ]), (3)
  ],
  controllers: [
    AppController,
    RoomsController,
  ],
  providers: [AppService, MessagesGateway],
})
export class AppModule {
}| 1 | Import MongooseModule from @nestjs/mongoose package |
| 2 | Add MongooseModule configurations for mongo database connection |
| 3 | Add models to MongooseModule so they can be injected later in the application components |
Now we need to create three models Message, Room, and User.
import {User} from './user.model';
import {Room} from './room.model';
import {ObjectID} from 'bson';
import {Prop, Schema, SchemaFactory} from "@nestjs/mongoose";
import {Types} from "mongoose";

@Schema()
export class Message {

  _id: ObjectID | string;

  @Prop({required: true})
  text: string;

  @Prop({required: true})
  created: Date;

  @Prop({required: true, ref: 'User', type: Types.ObjectId})
  owner: User;

  @Prop({required: true, ref: 'Room', type: Types.ObjectId})
  room: Room | string;
}

export const MessageSchema = SchemaFactory.createForClass(Message)import {Message} from './message.model';
import {User} from './user.model';
import {ObjectID} from 'bson';
import {Prop, Schema, SchemaFactory} from "@nestjs/mongoose";
import {Types} from "mongoose";
@Schema()
export class Room {
_id: ObjectID | string;
@Prop({required: true, maxlength: 20, minlength: 5})
name: string;
@Prop({type: [{type: Types.ObjectId, ref: 'Message'}]})
messages: Message[];
@Prop({type: [{type: Types.ObjectId, ref: 'User'}]})
connectedUsers: User[];
}
export const RoomSchema = SchemaFactory.createForClass(Room)import {Message} from './message.model';
import {Room} from './room.model';
import {ObjectID} from 'bson';
import {Types} from "mongoose";
import {Prop, Schema, SchemaFactory} from "@nestjs/mongoose";
@Schema()
export class User {
_id?: ObjectID | string;
@Prop({required: true, maxlength: 20, minlength: 5})
nickname: string;
@Prop({required: true})
clientId: string;
@Prop({type: [{type: Types.ObjectId, ref: 'Message'}]})
messages?: Message[];
@Prop({type: [{type: Types.ObjectId, ref: 'Room'}]})
joinedRooms?: Room[];
}
export const UserSchema = SchemaFactory.createForClass(User)Modify Gateways and Controllers
After that we need to modify messages.gateway.ts, so we inject each db model:
import {OnGatewayDisconnect, SubscribeMessage, WebSocketGateway, WebSocketServer} from '@nestjs/websockets';
import { Socket } from 'socket.io';
import { Message } from '../../models/message.model';
import { User } from '../../models/user.model';
import { Room } from '../../models/room.model';
import {InjectModel} from "@nestjs/mongoose";
import {Model} from "mongoose";
import {Server} from "socket.io";

@WebSocketGateway({cors: '*:*'})
export class MessagesGateway implements OnGatewayDisconnect {

  constructor(@InjectModel(Message.name) private readonly messagesModel: Model<Message>,
              @InjectModel(Room.name) private readonly roomsModel: Model<Room>,
              @InjectModel(User.name) private readonly usersModel: Model<User>) { (1)
  }

  @WebSocketServer()
  server: Server;

  async handleDisconnect(client: Socket) { (2)
    const user = await this.usersModel.findOne({clientId: client.id});
    if (user) {
      this.server.emit('users-changed', {user: user.nickname, event: 'left'});
      user.clientId = null;
      await this.usersModel.findByIdAndUpdate(user._id, user);
    }
  }

  @SubscribeMessage('enter-chat-room') (3)
  async enterChatRoom(client: Socket, data: { nickname: string, roomId: string }) {
    let user = await this.usersModel.findOne({nickname: data.nickname});
    if (!user) {
      user = await this.usersModel.create({nickname: data.nickname, clientId: client.id});
    } else {
      user.clientId = client.id;
      user = await this.usersModel.findByIdAndUpdate(user._id, user, {new: true});
    }
    client.join(data.roomId);
    client.broadcast.to(data.roomId)
      .emit('users-changed', {user: user.nickname, event: 'joined'}); (3)
  }

  @SubscribeMessage('leave-chat-room') (4)
  async leaveChatRoom(client: Socket, data: { nickname: string, roomId: string }) {
    const user = await this.usersModel.findOne({nickname: data.nickname});
    client.broadcast.to(data.roomId).emit('users-changed', {user: user.nickname, event: 'left'}); (3)
    client.leave(data.roomId);
  }

  @SubscribeMessage('add-message') (5)
  async addMessage(client: Socket, message: Message) {
    message.owner = await this.usersModel.findOne({clientId: client.id});
    message.created = new Date();
    message = await this.messagesModel.create(message);
    this.server.in(message.room as string).emit('message', message);
  }
}| 1 | Inject mongoose models for: Message, Room, and User. |
| 2 | Handles user disconnection, it sends an event that the user is disconnected. |
| 3 | Handles subscription to enter-chat-room event, which is in charge of adding user to a chat room, if the user doesn’t exist then create a new one. |
| 4 | Handles subscription to leave-chat-room event, which remove user from the chat room and emits users-changed event to all users of the chat-room |
| 5 | Handles subscription to add-message event, which is in charge of adding messages coming from users in the chat room |
Then we need to modify rooms.controller.ts, so we inject Room model into it:
import { Body, Controller, Get, Param, Post, Query } from '@nestjs/common';
import { Room } from '../../models/room.model';
import {Model} from "mongoose";
import {InjectModel} from "@nestjs/mongoose";

@Controller('api/rooms')
export class RoomsController {
  constructor(@InjectModel(Room.name) private readonly model: Model<Room>) {} (1)

  @Get()
  find(@Query('q') q) { (2)
    if (q) return this.model.find({name: {$regex: new RegExp(`.*${q}.*`)}});
    else return this.model.find();
  }

  @Get('/:id')
  findById(@Param('id') id: string) { (3)
    return this.model.findById(id);
  }

  @Post()
  save(@Body() item: Room) { (4)
    return item._id
      ? this.model.findByIdAndUpdate(item._id, item, {new: true})
      : this.model.create(item);
  }
}| 1 | Inject Room mongoose model |
| 2 | Handles GET request for api/rooms. This request could contains a query parameter called q. This could contain a partial room.name value so users can query to the database with values that matches the partial value. If the query parameter is not present then it will return the full list of rooms. |
| 3 | Handles GET request for api/rooms/:id. Finds and returns the full information of the room matching that id. |
| 4 | Handles the POST request for api/rooms. If the item contains an _id value, it updates any previous created room. if not, it creates a new room with the passed values. Finally, it returns the saved value to the client. |
Finally we need to add messages.controller.ts. To do that you should run:
nest g co controllers/messagesThen modify messages.controller.ts with next code:
import { Controller, Get, Query } from '@nestjs/common';
import { Message } from '../../models/message.model';
import {Model} from "mongoose";
import {InjectModel} from "@nestjs/mongoose";

@Controller('api/messages')
export class MessagesController {
  constructor(@InjectModel(Message.name) private readonly model: Model<Message>) {} (1)

  @Get()
  find(@Query('where') where) { (2)
    where = JSON.parse(where || '{}');
    return this.model.find(where).populate('owner').exec();
  }
}| 1 | Inject Message model |
| 2 | Handles GET request for api/messages. This request could contains a query parameter called where. This could contain any query so users can query to the database with values that matches it, for example {owner: {_id: '123'}}. If the where query parameter is not present then it will return the full list of rooms. |
|
At the moment queries of controllers does not have any validation so it’s pretty dangerous to use it like that. Also Gateway and Controllers need an authentication and permission system so only users with needed permissions can access and modify data. In next tutorials I will add a better handling of it. |
Ionic Application
In the previous tutorial inside our Ionic chat app we created 2 screens: On the first screen we picked a name and join the chat, on the second screen we show the actual chatroom with messages. In this tutorial we are going to modify the first screen, so after setting the nickname we go to another page where we select the chat room from a list, and then in the last screen we will only show messages for that specified chat room.
|
Before continue with this part, in the console go to |
Adding Models
Before continue it is good idea to add the models to our app, so create next files:
import { User } from './user';
import { Room } from './room';

export interface Message {
  _id?: string;
  text?: string;
  owner?: User | string;
  room?: Room | string;
}import { Message } from './message';
import { User } from './user';
export interface Room {
_id?: string;
name?: string;
messages?: Message[];
connectedUsers?: User[];
}import { Message } from './message';
import { Room } from './room';
export interface User {
_id?: string;
nickname?: string;
clientId?: string;
messages?: Message[];
joinedRooms?: Room[];
}As you can see those files are only interfaces that have the same attributes as the server entities.
| Even though there is a way to put this models in a separate library and share this library between the server and client we are not going to do it in this tutorial. |
Joining a Chatroom
So now we need to add a way to select the chat room after setting the nickname. To do that we should modify the file src/app/pages/home/home.ts with the next code:
import { Component } from '@angular/core';
import { NavController } from '@ionic/angular';

@Component({
  selector: 'app-home',
  templateUrl: 'home.page.html',
  styleUrls: ['home.page.scss'],
})
export class HomePage {
  nickname = '';

  constructor(private navController: NavController) { }

  joinChat() {
    sessionStorage.setItem('nickname', this.nickname); (1)
    this.navController.navigateRoot(`select-room`); (2)
  }
}| 1 | instead setting the nickname in the url-path we save it into the local storage variable so we can use it later. |
| 2 | we redirect the user to the select-room page |
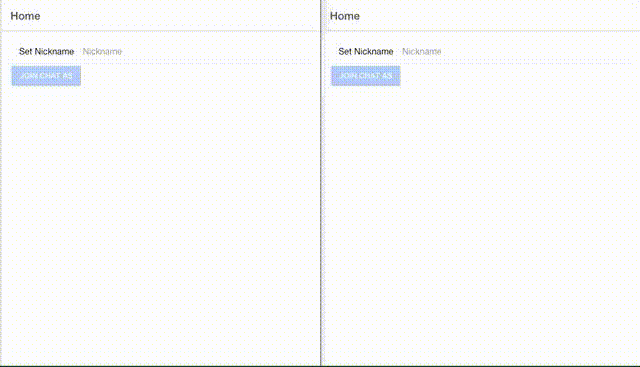
The template file will be the same, so you can keep the next code:
<ion-header>
  <ion-toolbar>
    <ion-title>
      Home
    </ion-title>
  </ion-toolbar>
</ion-header>

<ion-content padding>
  <ion-item>
    <ion-label stacked>Set Nickname</ion-label>
    <ion-input type="text" [(ngModel)]="nickname" placeholder="Nickname"></ion-input>
  </ion-item>
  <ion-button full (click)="joinChat()" [disabled]="!nickname">Join Chat as {{ nickname }}</ion-button>
</ion-content>
Building the Room Selection Functionality
In this page the user will select the chat room he will join, so we need a selection list and a filter box. The first step will be to create the page running next command:
ionic g page pages/select-roomthen we modify select-room.page.html to contain next code:
<ion-header>
  <ion-toolbar>
    <ion-back-button slot="start" defaultHref="/home"></ion-back-button>
    <ion-title>Select Room</ion-title>
  </ion-toolbar>
  <ion-toolbar primary>
    <ion-searchbar ngModel (ngModelChange)="searchRoom($event)" autocorrect="off"></ion-searchbar> (1)
  </ion-toolbar>
</ion-header>

<ion-content padding>
  <ion-list>
    <ion-item *ngFor="let room of rooms" (click)="joinRoom(room)"> (2)
      <ion-label>{{room.name}}</ion-label>
    </ion-item>
  </ion-list>
</ion-content>

<ion-footer>
  <ion-item>
    <ion-input type="text" placeholder="Add Room" [(ngModel)]="roomName" name="roomName"></ion-input> (3)
    <ion-button (click)="addRoom()" [disabled]="!roomName" fill="clear" size="large" slot="end">
      <ion-icon name="add"></ion-icon>
    </ion-button>
  </ion-item>
</ion-footer>| 1 | In the header we show the title and a search-box which executes the method searchRoom whenever user types-in and the debounce time has elapsed. |
| 2 | The content shows the list of rooms filtered by the search box. Whenever the user clicks on any of the items of the list, it will be redirected to the chat-room page. |
| 3 | The footer contains a text-box that receive the name of a new chat-room and a plus button which executes the method addRoom. |
Before modifying the select-room.page.ts file, it will be needed to add the debounce-decorator-ts package. To do it, run next command at the root directory of chat-client app:
npm i -s debounce-decorator-tsthen we modify select-room.page.ts to contain next code:
import { Component, OnInit } from '@angular/core';
import { Room } from '../../models/room';
import { RoomsService } from '../../services/rooms.service';
import { debounceFn } from 'debounce-decorator-ts';
import { NavController } from '@ionic/angular';

@Component({
  selector: 'app-select-room',
  templateUrl: './select-room.page.html',
  styleUrls: ['./select-room.page.scss'],
})
export class SelectRoomPage implements OnInit {

  rooms: Room[];

  roomName: string;

  constructor(private roomsService: RoomsService,
              private navController: NavController) { } (1)

  ngOnInit() {
    this.searchRoom(''); (2)
  }

  @debounceFn(500)
  searchRoom(q: string) { (3)
    const params: any = {};
    if (q) { params.q = q; }
    this.roomsService.find(params).subscribe(rooms => this.rooms = rooms);
  }

  joinRoom(room: Room) { (4)
    this.navController.navigateRoot('chat-room/' + room._id);
  }

  addRoom() { (5)
    this.roomsService.save({name: this.roomName}).subscribe(room => {
      this.roomName = '';
      this.rooms.push(room);
    });
  }
}| 1 | In the constructor we inject |
| 2 | In the ngOnInit method we search for all the rooms |
| 3 | The searchRoom method is in charge of searching for rooms in dependence of the parameter q. This method calls roomsService.find method passing parameter q to it. After receiving the rooms list, it fills a local public array to be used by the html template. |
| 4 | The joinRoom method navigates to chat-room/:id. That id parameter is later used in the chat-room page. |
| 5 | The addRoom method calls roomsService.save method which sends the information of the new room to the server. After saving the value, it receives the new value and adds it to the rooms local public variable. |
Modifying the Chat Functionality
To receive new chat messages inside the room we have to listen for message socket event which receive the messages from the server.
Whenever we get such a message we simply push the new message to an array of messages. Remember, since now we have a database to save historic data, we are going to load it.
Sending a new message is almost the same as before, we simply emit our event to the server with the right type.
Finally, we also listen to the events of users joining and leaving the room and display a little toast whenever someone comes in or leaves the room. It’s the same logic again, with the socket.on() we can listen to all the events broadcasted from our server!
Go ahead and modify chat-room.ts:
import { Component, OnDestroy, OnInit } from '@angular/core';
import { ActivatedRoute } from '@angular/router';
import { Socket } from 'ngx-socket-io';
import { ToastController } from '@ionic/angular';
import { Subscription } from 'rxjs';
import { MessagesService } from '../../services/messages.service'; (1)
import { RoomsService } from '../../services/rooms.service';
import { Room } from '../../models/room';
import { Message } from '../../models/message';

@Component({
  selector: 'app-chat-room',
  templateUrl: './chat-room.page.html',
  styleUrls: ['./chat-room.page.scss'],
})
export class ChatRoomPage implements OnInit, OnDestroy {
  messages: Message[] = [];
  nickname = '';
  message = '';
  room: Room = {};

  subscription: Subscription;

  constructor(private route: ActivatedRoute,
              private socket: Socket,
              private toastCtrl: ToastController,
              private messagesService: MessagesService,
              private roomsService: RoomsService) { } (2)

  ngOnInit() {
    this.nickname = sessionStorage.getItem('nickname'); (3)

    this.subscription = this.route.params.subscribe(params => {
      const roomId = params.roomId; (4)
      this.socket.emit('enter-chat-room', {roomId, nickname: this.nickname}); (5)
      this.roomsService.findById(roomId).subscribe(room => { (6)
        this.room = room; (7)
        this.messagesService.find({where: JSON.stringify({room: this.room._id})}).subscribe(messages => { (8)
          this.messages = messages; (9)
        });
      });
    });

    this.socket.on('message', message => this.messages.push(message));

    this.socket.on('users-changed', data => {
      const user = data.user;
      if (data['event'] === 'left') {
        this.showToast('User left: ' + user);
      } else {
        this.showToast('User joined: ' + user);
      }
    });

  }

  ngOnDestroy() { (10)
    this.subscription.unsubscribe();
    this.socket.removeAllListeners('message');
    this.socket.removeAllListeners('users-changed');
    this.socket.emit('leave-chat-room', {roomId: this.room._id, nickname: this.nickname});
  }

  sendMessage() {
    this.socket.emit('add-message', {text: this.message, room: this.room._id}); (11)
    this.message = '';
  }

  async showToast(msg) {
    const toast = await this.toastCtrl.create({
      message: msg,
      duration: 2000
    });
    toast.present();
  }
}| 1 | We import models and services |
| 2 | We inject services MessagesService and RoomsService in the constructor |
| 3 | Instead getting nickname from url, we now get it from sessionStorage. |
| 4 | We get the roomId from the value coming from the route path param. |
| 5 | We emit that the user has entered to the chat-room. |
| 6 | Then we get the full information of the chat-room using roomsService.findById method. |
| 7 | After receiving the full chat-room info, we set it in a local public variable to be accessible to the html template. |
| 8 | Then we find all the messages of the chat-room using query: {where: JSON.stringify({room: this.room._id})} |
| 9 | After getting all the messages of the chat-room, we set them in a local public array to be accessible to the html template. |
| 10 | In the ngOnDestroy method we need to unsubscribe all the subscriptions, remove listeners for socket.io events, and emit leave-chat-room event so the server can know when a user has left the room. This method is always call whenever the user goes back using the back button. |
| 11 | We emit the add-message event with the message text and the room id. |
And also chat-room.html:
<ion-header>
  <ion-toolbar>
    <ion-back-button slot="start" defaultHref="/select-room"></ion-back-button> (1)
    <ion-title>
      Room: {{room.name}} (2)
    </ion-title>
  </ion-toolbar>
</ion-header>

<ion-content>
  <ion-grid>
    <ion-row *ngFor="let message of messages">

      <ion-col size="9" *ngIf="message.owner.nickname !== nickname" class="message"
               [ngClass]="{
                 'my_message': message.owner.nickname === nickname,
                 'other_message': message.owner.nickname !== nickname
                }"> (3)
        <span class="user_name">{{ message.owner.nickname }}:</span><br>
        <span>{{ message.text }}</span>
        <div class="time">{{message.created | date:'dd.MM hh:MM'}}</div>
      </ion-col>

      <ion-col offset="3" size="9" *ngIf="message.owner.nickname === nickname" class="message"
               [ngClass]="{
                 'my_message': message.owner.nickname === nickname,
                 'other_message': message.owner.nickname !== nickname
               }">
        <span class="user_name">{{ message.owner.nickname }}:</span><br>
        <span>{{ message.text }}</span>
        <div class="time">{{message.created | date:'dd.MM hh:mm'}}</div>
      </ion-col>

    </ion-row>
  </ion-grid>

</ion-content>

<ion-footer>
  <ion-item>
    <ion-input type="text" placeholder="Message..." [(ngModel)]="message"></ion-input>
    <ion-button fill="clear" color="primary" slot="end" (click)="sendMessage()" [disabled]="!message" size="large">
      <ion-icon name="send"></ion-icon>
    </ion-button>
  </ion-item>
</ion-footer>| 1 | we have to go back to select-room page instead home page |
| 2 | Instead of just showing Chat in the header, we now show Room: <room-name>. |
| 3 | now we compare message.owner.nickname instead comparing message.from |
Now launch your app and make sure your backend is up and running!
For testing, you can open a browser and another incognito browser like in my example at the top to chat with yourself.
Conclusion
As you can see adding MongoDB to our project was relatively simple. Furthermore, @nestjs/mongoose give us the huge ability to connect and handle the database without writing too much code.
Now this application looks more real since we can store all the messages, rooms, and users in our database. This leads to the fact that now we can create different chat-rooms with separate conversations.
To finish I just want to point that we need to add some sort of authentication and authorization system. So that, only users with required permissions can access rooms and messages. We will do that in next tutorials.